


Installing Strip Lights Behind Your TV Stand
Posted by Navdip Gahir on 31st Jul 2025
Turning your living room, and your TV viewing experience into something closer to a cinema room isn’t as difficult as you might think. If you’re considering doing this, you’ve probably already got or are getting the enormous TV and sound system.
But the final piece of the jigsaw is almost certainly lighting. And the best part is that it’s one of the simplest setups you can do, giving you a massive return on effort.
Why Put LED Tape Behind A TV Stand?

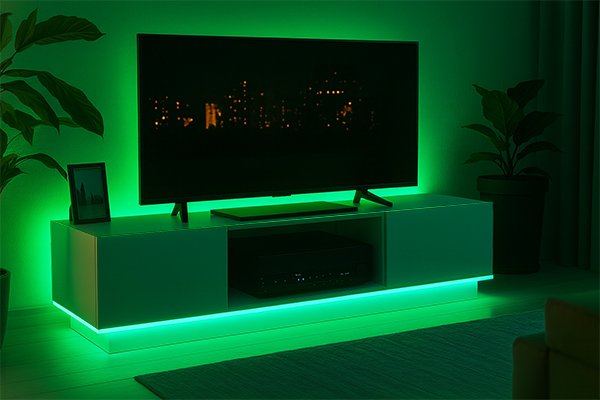
There are loads of reasons, but the main one really, is that it just looks so good. Just a single run of tape gives your living room that premium, media wall feeling, instantly elevating the entire space.
It also helps make the TV the focal point of the living room, highlighting it with elegant ambient lighting.
In a more practical sense, TV stand lighting can also help reduce glare from the TV, and reduce eye strain by spreading the light exposure to your eyes. Not to mention the moods and vibes you can create, especially once you get into the realm of colour changing tapes.
Choosing The Right Tape For Your TV Stand
The tape you go for really depends on what you’ll be using it for. We’ll start with power first.
Ordinarily, we’d recommend going for 8W tape if you’re just after a glow effect on the wall. However, TV Stand lighting is a great opportunity to create moods without having your main ceiling light(s) on.
For this reason, we’d actually recommend the higher 14-19W tape range, and if it is too bright, you can always dim it down, though this will require a dimmable driver to do so. This will though give you full freedom to use the lights how you please.
In terms of colour, there are a few options, which again depend on how you’re planning on using your tapes.
For simple ambient lighting, you can either go Warm White (3000K) for cosy vibes, or Day Light (4000K) for something a little more neutral.
However, if you’re looking for some real vibrance and mood, then you’ll definitely want to go for our RGB+CCT LED tape. This is perfect for moods, gaming setups and parties, as it lets you create any colour, including true warm white and cool white.
One of the best parts of this kind of setup though is that it’s not absolutely necessary to have your strips hardwired, as you’ve most likely got spare plug sockets around your TV anyway, so you can just use a 24V ACDC power adapter, meaning it’s 100% a DIY job without the need for an electrician!
Where Is The Best Place For My TV Stand Lighting?
Generally speaking, there are two ways you can install your tape.
The first is pretty obvious - horizontally across the back of your TV stand, and placing your TV stand approximately 5-10cm away from your wall, to guarantee that even light distribution on your wall.
This will create a nice upwash effect beneath your TV, giving it that subtle, high end look that’s normally reserved for premium catalogues.
The second way you can go is to add two more runs at 90o angles down the sides of your TV stand for a kind of ‘halo’ effect. This could be a more unique way of installing your strips, as it’s not something you see as often, but does look incredibly premium too.
Regardless of how you install them, the number one rule we’d strongly advise you stick to is to ensure that the tapes themselves aren’t visible. It just helps maintain that pro level look.
Controlling Your TV Stand Lighting
As we’ve recommended going for an ACDC power adapter, this changes the types of control options available to you.
The cornerstone of controlling your tape is our Easilight 5-in-1 Wi-Fi Receiver, because it basically does everything. Really.
It works with any type of tape except for pixel, it can be used both online and offline, and it can be used in both hardwired and plug & play setups. So how’s it best used for a plug in TV stand installation?
Let’s say you want to keep it simple. The 5-in-1 pairs to a range of compatible remotes, which lets you use it offline. You can switch it on and off, dim it, and if you have colour changing lights, you can switch between them on the fly too. All lovely stuff.
If you want to take things up a notch however, you can ditch the remote (saving money in the process) and opt for smart control instead, using your smartphone. More importantly, this lets you create scenes, routines and automations.
For example, you can create a scene where your TV stand lighting switches to Day Light (4000K) and 20% brightness (and for arguments sake, let’s say you also have smart spotlights, and you set these to 25% brightness). You can call your scene “movie time” for example, after which all you need to do is tell Alexa or Google Assistant “movie time”, and all your lights will automatically switch!
Transforming Your TV Stand
We love TV stand lighting here at WLED, because it’s simple, cheap and makes your home setup look like a million bucks. Going for an install like this will no doubt heighten your TV viewing experience, making movie nights and boxset binges that bit more enjoyable.
Warning though, that this may trigger an onset of friends and family to ask where you got your ‘cinema setup’ done from.
You can of course tell them you got it from WLED, and that we’re available on 0116 321 4120 and at sales@wled.co.uk. Our team can put together custom quotes, handle any cutting and soldering and generally offer any advice that you might need.
We are also available on Facebook and Instagram too. For all kinds of information about LED lights, be sure to have a look at our YouTube channel too.